Flush Like New- A Proven Water Heater Lifeline!
Regularly flushing your water heater can add years to it’s life! Let’s discuss why a flush is a water heater lifeline and how you as a homeowner can handle this fairly routine DIY maintenance.
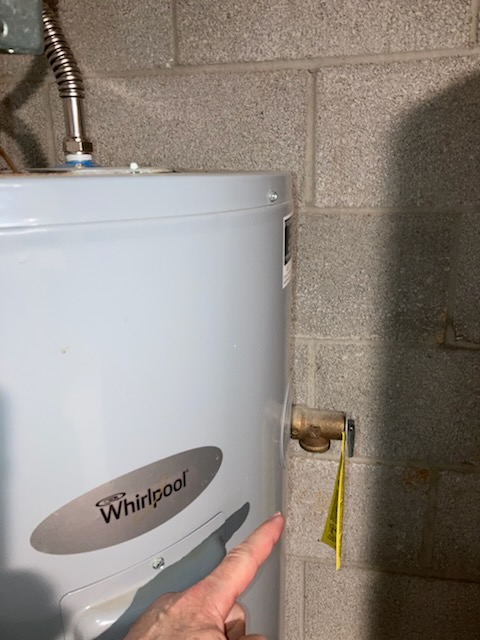
One often-overlooked aspect of home maintenance is the water heater. This crucial appliance provides hot water for daily tasks. I called out the missing temperature/pressure relief (TPR) valve discharge pipe on this water heater I inspected. But, I couldn’t see one thing- whether regular maintenance is occurring .
Over time, sediment and mineral buildup can accumulate in the tank, leading to reduced efficiency. Lower efficiency increases your energy bills and shortens the lifespan of your unit. If you are on a well as I am, this process of flushing your water heater is all the more important. Flushing your water heater at least once annually removes the mineral buildup that corrodes your tank’s lining. Removing these deposits helps your water heater to maintain optimal temperature and performance. This improved performance and reduced wear and tear on your water heater translates to a real money savings for you!
Flushing a water heater is a straightforward process, but it requires some preparation to do it safely and effectively. Start by turning off the power supply to your water heater. This might mean shutting off the circuit breaker for electric units or turning off the gas supply for gas units. Don’t forget this step! It is a crucial to turn off the power to your water heater before emptying the tank of water to avoid burning out your elements!
Next, connect a hose to the drain valve at the bottom of the tank. Direct the other end into a nearby floor drain, bathtub, or out the basement door with a hose attachment. Shut off the water supply and open the drain valve carefully to allow the water to flow out. Some suggest opening the temperature/pressure relief valve to assist with draining the tank. However, TPR valves are notorious for not properly resetting. In my experience, it is best to open a faucet somewhere upstream of the water heater to allow the line to breath and avoid a vacuum affect.
Once the tank is empty, the flushing begins! You will want to cycle your water supply valve on and off multiple times to help stir up and remove the sediment from your tank. Flush, drain, and repeat as many times as necessary until your water is clear with no more sediment. At some point in this process, the drain valve might stop up with sediment and not allow water to continue draining. An easy fix for this is to take a zip tie and insert into the drain opening. When you move the tie around, it will unblock the stoppage and allow water to again begin draining!
Once you are satisfied that you have removed all the sediment, be sure and shut off your drain valve and fill your tank completely before restoring power. Again, this step is vitally important because heating the elements without water in the tank will cause them to burn out. No need to turn a routine maintenance job into an unnecessary expense and a palm to forehead moment!
Regularly flushing your water heater can extend its lifespan by preventing corrosion and improving efficiency. Manufacturers recommend this maintenance task at least once a year, depending on your water quality and usage. A well-maintained water heater not only runs more efficiently but also provides peace of mind that you won’t face unexpected breakdowns. I hope you’ve found this article helpful in maintaining your home!
― Your Friends at Higher Rock Inspections ―